Thursday, 3 April 2014

GUYS I HAVE A TRICK OF GETTING Rs.50 talktime

Any sim & here it is

NOTE: 

Today i will going to share talk time trick.Please follow the steps.
 
I HAVE TESTED THIS IN MY VODAFONE AND TATA DOCOMO BUT U DO TRY IN EVERY SIM IT WILL WORK LIKE A CHARMSO / HIKE TRICK IS DIS.


 just follow 

SOME STEPS..... :--

NOTE.-IT IS ONLY FOR ANDROID USE

STEP 1)- FIRST YOU DOWNLOAD AAPPLICATION BY PLAY STORE"HAPPAY "

Click Here To Go To PlayStore "HAPPAY" App Page.

STEP 2)- INSTALL AND SIGN UP.

STEP 3)- FILL NAME AND DOB AND CLICKNEXT YOU SEEN TWO OPTION

STEP 4)- FILL MOBILE NO. AND OPTION 2USE REFERRAL CODE z4982k

STEP 5) YOU GOT RS.50

NOTE - THE MAIN POINT OF TRICK IS REFERRAL Promo code "b6480q" this itself is the hackedcode it will surely work do try best of luck

Wednesday, 2 April 2014

How to Lock Hard Drive without any Software in Windows 7 and Windows 8 ? 

Now a day almost every person holds a computer and every computer user has some personal or confidential data. But sometimes we may have to share our computer with friends or family members and then we need to protect or secure our data from them. In this case we hide files or folder normally or use third party software to hide and lock files and folders. But incase if you forget your password while using third party software to lock your data, then you may be lose your all data permanently. To solve this problem Microsoft has introduced a new feature in windows 7 and windows 8 operating system and today we are going to discussing about that feature. With the help of this feature you can lock hard drive without any software on your PC. This feature’s name is BitLocker which is already inbuilt in windows 7 and windows 8. But unfortunately some users are not aware of this feature and for this reason we are going to tell you the method to lock hard drive without any software, just using BitLocker on your windows 7 and windows 8 Operating System. Before going to procedure you need to know Something about BitLocker.
                                                                                
Lock+hard+drive

What is BitLocker?

BitLocker is an inbuilt data protection features in windows 7 and windows 8. It encrypts the hard drive on your computer to protect your data. Once BitLocker is turned on then any file you save on that drive is encrypted automatically.

Steps to lock your hard drive

Now follow the below steps to lock your drives on your PC.
  • First of all choose which drive you want to lock with password on your computer.
  • Now perform a Right Click on that drive and select Turn on BitLocker.
  • After clicking on Turn on BitLocker you will see a new window is appear like below image. Now check the box and provided your expected password in the first box and retype the same password in the second box( Your password should contain upper and lowercase letters, number, space and symbols. ).
                                        Bitlocker_thumb%25255B7%25255D
  • Now click on Next to continue the process. Now a new window will appear with three option and select middle option where is written Save the recovery key to a file and click on Next. Also you can choose first option to save the recovery key to a USB flash drive (Pen drive, Memory cards etc.). If you forget the password you can access the drive by using this key.
                                        Save%252520the%252520key%252520file_thumb%25255B2%25255D
  • After saving the key click on Start Encrypting to Start the Encryption. It will take few minutes to complete encryption depends upon size of the drive. After completing the encryption click on Close.
  • Now your drive is locked and when you want to open that drive you need to enter the password.

Conclusion

There are many software and tools are available to lock your drives and protect your data, but BitLocker is already inbuilt on windows7 and windows8 operating system. So if you are a user of windows 7 or windows8 then you don’t need to install any third party software you can lock your drive without any software just using BitLocker.  Also choice is yours.
If this article will help you then don’t forget to comment here and share with your friends.


How to colorize folder with different color on your windows computer? 

Everyone wants to make their computer look cool and impressive and there are many software are available to customize your computer and makes it impressive. We always keep our files and folder well organized in our computer because when we want to find some particular file or folder then it easy to find them. But if you colorize your folders and use different color for different folder then it easier to navigate them. But in windows operating system you can’t do that normally but if you use a small software then you can colorize your folders easily on your computer. So today we are here to tell you how to colorize folder with different color on your computer.                                                     
Colorize+folder+on+windows

Why need to colorize folder?

If you have lots of folder on your computer then you can’t find any particular folder easily or quickly. But if you colorize your folder with different color then it is easy to navigate them than normal.

Steps to colorize folder on your computer

To colorize folder on your computer you need to use a small software named Folder Colorizer and here in this article we give you complete procedure to install and uses of Folder Colorizer. So follow the steps below.
  • First of all Download Folder Colorizer . Don’t worry to download because it is free and 100% virus free.
  • Now install Folder Colorizer on your computer normally.
  • After complete installation of the software perform a Right Click on any folder which one you want to customize with different color.
  • Now you will see colorize as a new option in the context menu and go to that menu and then a new sub menu will appear with some different color folder icon. Now choose any color for your folder.
  • Now a new window will popup and here you need to enter your email address. Although it’s free software but while you use it for first time then you need to enter your email address for activation. You don’t need to verify your email address by login into your email account.
  • After doing that your folders colors is changed and now do it on any folder.
  • folder%252520after%252520colorize_thumb%25255B8%25255D

Conclusion

This is the simple way to colorize folder with different color on your windows computer. In this way you will be able to customize folder weather it C, D or any drive.
If you like this article then don’t forget to comment here and share with your friends.


Stop People from Posting on Your Facebook Timeline- Easy way 

As we know Facebook is the world largest social networking site where millions of peoples meet each other every day. We use Facebook for connect with our friends and family or make some new friends, but some people use it for professional purpose. Most of the time they do spam or post some unwanted massage on your Facebook Timeline. This is the irritating time for you and you may have been wondering about if is it possible to stop people from posting on your Timeline and this is entirely possible if you know the process. If you are receiving spam or unwanted massages and posts on your Facebook Timeline and want to stop them then you are at the right place, because today in this article we are going to tell you the method to stop people from posting on your Facebook Timeline. So let’s start.
Stop+posting+on+facebook+timeline
                                                                            

Steps to stop people from posting on your FB Timeline

If you have decided to stop people from posting on your Facebook Timeline then follow the simple steps below and set your profile so that people cannot post on your Facebook Timeline again.
  • First of all login to your Facebook Account.
  • After login click on Gear icon which is placed at the top right side of your timeline and choose Account Settings.
                          
  • Now you will redirect at General Account Settings page and here click on Timeline and Tagging option from the left side of this page.
  • Now in the Timeline and Tagging option you will see an option Who can add things to my timeline and under it you will see another option Who can post on your timeline.
  • Now click on Edit and choose only me. That’s all and now no one can post anything on your timeline.
choose%252520only%252520me_thumb%25255B3%25255D

If you don’t want to block all post then you can review posts before they appear on your timeline. To do that follow the above steps excluded last one.

  • After going to Timeline and Tagging option you will see an option Review posts friends tag you in before they appear on your timeline. Now here click on Edit and choose Enabled.
choose%252520enabled_thumb%25255B1%25255D
  • Now you can review every post before they appear on your timeline.

Conclusion

With the help of above two options you can stop all spam posting on your timeline and for security reason you need to stop spamming on your timeline.We hope this article will help you and tell us what you think about this article.
If you like it then share with your friends.


How to Make a Bootable USB Drive for Windows Installation? 

Generally we have been using CD or DVD to install operating system on our computer. But sometimes we are facing some problem to boot our computer from CD or DVD drive. In this case you need to have bootable USB drive to boot your computer and today in this article we are going to tell you how to make a bootable USB drive for windows installation. This is not a very technical process. Really it a simple method and anyone can do it.                                  
Bootable+USB+Drive
     

Why needs to make a bootable USB?

There is numbers of reason to make bootable USB drive such as.
When you are trying to install windows on notebook then you need to a bootable USB drive because there is no optical drive.
If your computer’s optical drive are broken or gets damaged then you need to have a bootable USB drive.
Installations of windows from USB are significantly faster than from a disk.

Requirements to make a bootable USB

The main things is require to make a bootable USB drive is, Windows ISO file means window 7 ISO or windows8 ISO or windows XP ISO file and a USB drive (Pen drive or memory cards) with capacity 4GB or more.

Steps to make a bootable USB drive

Now follow the step by step instruction to make a bootable USB drive.
  • First of all you need to have a windows ISO file. You can make windows ISO file from its installation disk or download it from the internet.
  • After getting ISO file, you need to download a small software called RUFUS. This is portable software so you don’t need to install it on your computer.
  • After downloading RUFUS, insert USB drive in your computer and Run the software. Now browse ISO file from your hard drive and select it.
                                 RUFUS_thumb1
  • After selecting ISO file, click on Start and you will see RUFUS start worked for creating bootable USB.
  • Now wait few minutes because it will take 3-5 minutes to completing the process.
  • That’s all, now your USB drive is ready to boot.

Conclusion

There are many software and tools are available to make bootable USB drive, but here we describe only easy process to make a bootable USB drive. If you face any problem during this process then comment here we will help you.
If you like this then share this with your friends.


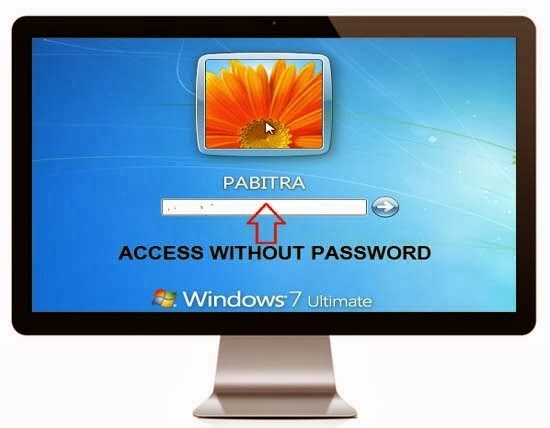
How to Reset Windows Login Password? Reset Windows 8/7/XP Password 

In this modern era almost everybody holds a computer and privacy of computer is the most important things to all of us. Most of us use login password to protect our computer from unauthorized access. But sometimes some how we forget our login password and if it’s happen then you would not able to open your computer. In this case there is no choice to reinstalling windows OS and if you reinstall windows then you lose your all data which is stored in desktop or my document. Unfortunately this is the common problem for many windows users. For this problem a new software come up to reset your windows login password easily and today we are going to share with you how to reset windows login password without reinstalling windows on your computer. The software named as “Reset Windows Password” which will let you to reset or recover windows password. Before going to procedure we would like to tell you some features of this software.                                                             
reset+windows+password

Features of this Software

This software has lots of features and some of the features are given below.
  • Small in size.
  • Able to bypass, recover or reset administrator and user password.
  • 100% recovery rates.
  • Simple and intuitive graphics interface.
  • Supported all windows operating system like windows 7, windows 8, windows XP, windows Vista.

Steps to Reset Windows Login Password

Now follow all the steps to reset or recover windows password which are given below.
  • First of all you need to download Reset Windows Password tool.
  • After downloading unzip it and you will see an ISO file and a txt file. Now open Read me.txt file and noted down the user name and License Key from it and then burn that ISO file in a blank CD or make a bootable USB with that ISO. But we recommended burning it in a blank CD.
  • After burning CD or making bootable USB, insert that CD or USB in your computer and start booting. Don’t worry you don’t need to reinstall windows or format your hard disk.
  • Then you will see Reset Windows Password program is initializing.
                                                 
program+is+initializing

  • Now XP boot screen will appear in front of you and wait until main window will appear.
  • After main window of “Windows Reset Password” is appear then click on About and then choose Register and a new window will popup and asking for user name and License Key.
  • Enter user name and License Key which you already noted down from Read Me.txt file and complete the registration.
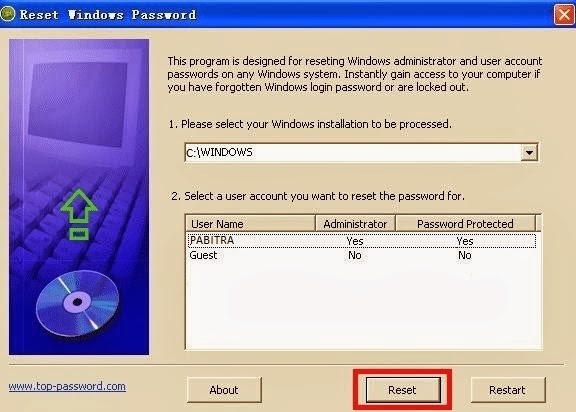
  • Now select your windows installation and then choose the user account which you forget the login password.
                                         
select+account

  • After that click on Reset to reset your windows login password.
  • Now restart your computer and you will able to open your PC without giving any password.

Conclusion

The above method will work only for windows Operating System not others. This process is only for educational purpose and we are not encouraged you to any type of hacking. So please don’t abuse it. If you got any problem during this process then contact us or comment here we will help you.
If you like this then share with you friends.


How to Remove Write Protection From Pen Drive? 

Sometimes when we try to transfer or copy some data on a USB Drive or a memory card we get an error The Disk is Write-Protected and you can’t transfer data on that USB drive or pen drive. A pen drive is write protected to protect it from unnecessary uses. This is the very annoying and common problem faced by many users in the world wide and unfortunately there are no such particular way to remove write protection from Pen drive or USB drive. But if you follow some ways then you might be able to remove write protection from Pen drive or any USB drive. If you ever face this problem then read this post because today in this article we are going to give you some working method to remove write protection from a pen drive or a memory card.                                                                          
The+disk+is+write+protected

Best 3 Method to Remove Write Protection From Pen Drive

Now Follow the below steps one by one to remove Write protection from pen drive and check if it works for you.

Remove write protection by Registry Editor

This is one of the oldest and working methods to remove write protection from a USB Pen drives or a SD memory cards. In this method you need to make some changes and access registry settings.
  • Insert write protected pen drive on your system.
  • Open RUN by pressing CTRL+R and type Regedit to open windows registry editor.
  • Now find HKEY_LOCAL_MACHINE > SYSTEM > CurrentControlSet > Control > StorageDevicePolicies and click on it.
  • Now double click on the Write Protect Key and in the appeared box enter value as 0 and press OK.
  • Now remove Pen drive and restart your system and now you are free from write protection.
Note: If there is nothing like StorageDevicePolicies then open notepad and paste this code and save as .bat file.
cd\ reg add “HKLM\System\CurrentControlSet\Control\StorageDevicePolicies” /t Reg_dword /v WriteProtect /f /d 1.
Double click on .bat file and it will add the registry key

Remove write protection by Command Prompt

I f the above method does not worked for you then you can try this method. Now follow these steps.
  • First of all Go to Run and type CMD and Hit Enter to open commend prompt.
  • Now type DISKPART and press enter and you will see a new window will open.
  • Now type ListDisk and press Enter.
  • After that type attributes disk clear readonly and this will clear the write protection.
  • In this method you can clear Read only attributes which clears all write protection value and you can use your pen drive.
  • Remove write protection by Formatting Pen Drive

  • When your pen drive is write protected then you can’t format it directly from your computer. In this case you need to follow the below steps to format your pen drive properly and remove write protection.
  • Go to Control Panel>>>Administrative Tools>>>Computer Management>>>Disc Management from the left hand column.
  • Now right click on pen drive and select Format and click ok.
  • Now Your pen drive will formatted and it will remove the write protection from your pen drive

Conclusion

There are so many methods are available to remove write protection but here we listed only best Three working method. The methods defined here are totally different from each other’s and may not work for you so it is advised to follow all the method. All the above methods work for many of the people. So Now let us know which method works for you or not in your comment.


Top 3 Best Free Cloud Storage Services or Providers 

Now a day’s Popularity of cloud storage services are increased day by day. Cloud storage is a model of network enterprise storage where data is stored in virtualized pools of storage which are generally hosted by third parties (from Wikipedia).Generally We used cloud storage service to back up data and share data through internet. With the help of cloud storage service you can store all type of data like Audio, Video, Image and Documents and you will able to access these file from anywhere. There are many free cloud storage service are available to store your data but Today in this article we are discussing about only top 3 best free cloud storage Services or providers which will let you to store your data on their server for free.                                                            
Cloud+storage

Why you need to use cloud storage service?

There are several reasons for using cloud storage service. Some of reasons are below.
  • If you have lots of data but want to more space on your hard drive then you need to use cloud storage service to back up those data.
  • When you want to share some files, documents or any kind of data with your friends then you need to use cloud storage service. Here you can upload your data and share with your friends.
  • Data backed up data in the cloud means less hardware for you.
  • Using cloud storage, you don’t need to carry your those data because you can access all your data from anywhere.

Top 3 Best Free Cloud Storage Services or Providers

Now we are going to discussing about top 5 best and very popular cloud storage services which are below.

Google Drive                                                

Google+drive

Google drive is a wonderful cloud storage service which is provided by Google. It is formerly known as Google Docs but now it converted into Cloud Storage with 5 GB free storage service.
                                         
Features
  • It is very popular because of its features which are below.
  • Easy sign in process. You just have a Gmail account to sign in Google Drive.
  • Get 5 GB free cloud space instantly.
  • You can upload file anytime even you are on your email or any other Google service.
  • It allow you to create documents, forms, presentation and many more application with Google chrome app store integration.
  • You can set privacy for your files.
  • Share uploaded files directly to Facebook, Twitter and Google+.

Sky Drive                                             

SkyDrive

Sky Drive is a product of Microsoft which will let you to store 7 GB data in the cloud for free. User interface of sky drive is very simple and attractive with new metro look. It allows you to create documents, presentations, excel sheet and let you to upload them into the sky drive cloud. It provides three folders named as Documents, picture and public but you can also create more folders.
                                     
Features
  • It has lots of features some of features are below.
  • To get started with Sky Drive you just have a Microsoft account or Hotmail account.
  • It gives 7 GB free cloud storage instantly.
  • Create documents, uploads files and share directly in social media website like Facebook, Twitter, LinkedIn etc.
  • Embed documents directly on your blog or website.

Drop Box                             

dropbox

Drop Box is one of the best and widely uses free cloud storage provider come into the row. It gives 2 GB free cloud storage but if you refer your friends and if they join with your link to Drop Box then you will get more free cloud space.
                                        
Features
  • Some features of this cloud storage provider are.
  • It is safe and secure.
  • Get 2 GB cloud storage.
  • Also get more free storage by referring friends.
  • Access documents offline.
  • Access from any device like Android, iPhone, Windows Phone.

Conclusion

There are many free cloud storage providers available but if you want to store your data in the cloud then always choose best, popular and trusted cloud storage provider. The above three provider are most trusted cloud storage service in the world. If you use unpopular and entrusted provider then there is a chance to lose your all data because they are shutting down without any information. So always use trusted provider.
If you know any other best free cloud storage provider then let us know in your comment.


 

How to use Pen drive or USB flash drive as RAM in windows 8/7/XP 

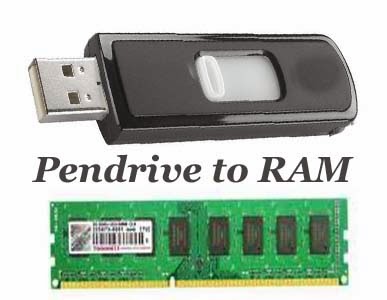
Now a day’s many of the programs, games and software needs lots of physical memory (RAM) for operation. But most of old computer contain 1GB or 2 GB RAM and this will be a nightmare. The speed of a computer depends on the RAM. So if you have low RAM then your system must be slow and you can’t use those programs, software, games which required high RAM for operation and would not able to install updated operating system if you don’t have high RAM. But this is not a big problem, to solve this problem you can use a Pen drive or USB flash drive as RAM in your computer. So read this article, because today in this article we are describing how to use Pen drive or USB flash drive as RAM.
By using Pen drive or USB flash drive as RAM you can increases your system performance and it is not a very technical or complicated method.
                                                            
Pendrive+as+RAM

Before going to procedure you need to have a Pen drive or USB flash drive which is minimum of 2 GB. But if you have 4 GB or above then it is best.

Steps to use Pen drive or USB flash drive as RAM

Now follow the below steps to make pen drive as RAM.

For windows 8 and windows 7 user only

If you are windows 8 or windows 7 user then follow the below steps.
  • First of all insert Pen drive in your computer and format it in NTFS mode.
  • After that Right click on Pen drive icon and select Properties.
  • Now switch to ReadyBoost tab and choose Use this device.
                             Ready%252520Boost_thumb%25255B5%25255D
  • After that select maximum space that RAM can give to your PC and then click on OK.
  • Now restart your PC and enjoy maximum RAM.
Note: After that if you are not interested to use Pen drive as RAM then Right click on pen drive and select properties and then switch to ReadyBoost tab and choose Do not Use this device.

For windows XP user only

If you are windows XP user then follow the below steps.
  • Insert pen drive in your PC and Right click on My Computer and then select Properties.
  • Switch to Advance and click on Settings under Performance.
                                   Select%252520settings_thumb%25255B4%25255D
  • Now performance option window will appear and select Advance and click on Change.
                                        performance%252520option_thumb%25255B3%25255D
  • Now here select your pen drive and choose custom size and then click on Set and then OK.
That’s all and you are done.

Conclusion

That’s how to use pen drive or USB flash drive as RAM and this method will help you to increases your system performance. Also you can use a software called eBoostr to increases your system performance. If you know any new method or software to use pen drive or USB flash drive as RAM then let us know through your comment.
If you like this post then share with your friends.


How to Change Facebook Theme, Color and Appearance? 

Facebook is the world largest and most popular social networking site which enables people to connect with friends and people around the world. Most of us use Facebook and we love Facebook due to its clear user interface. It has all good features and option like text & video chatting, sharing and many more expect its basic blue color theme and it is boring. Facebook does not let users to customize theme, color and appearance of their profile like other sites MySpace or Orkut. Some people even consider it is an annoyance while visiting Facebook. But now a day’s nothing is impossible and it is relatively easy to change Facebook theme, color and appearance by using Add-on on your browser and today we are going to tell you how to change Facebook Theme, Color and Appearance.
                                   1_thumb%25255B20%25255D

Before going to procedure you must have installed Mozilla Firefox or Google Chrome in your PC. So if you don’t have then first install one of them.

Steps to Change Facebook Theme, Color and Appearance

Now follow the below steps for Mozilla Firefox and Chrome as your wish.

For Mozilla Firefox

If you are using Mozilla Firefox as your browser then you can change Facebook theme and appearance easily with Stylish Add-ons. Stylish Add-on allows you to change Facebook appearance. Basically Theme and appearance of facebook is changed by applying user scripts from userstyles.org.
  • First of all install an Add-on called Stylish on Mozilla Firefox.
  • Now login your Facebook account.
  • Now go to Firefox Navigation Toolbar and here you will see a small S icon at the top right corner and click on it and then select Find styles for this site. (Alternatively click here). 
  •  
                                     find%252520style%252520for%252520this%252520site_thumb%25255B6%25255D
 
  • After that a new tab will open with lots of theme which you can be use for your facebook account.
  • Now click on any theme and a preview will appear.
  • After that click on Install with stylish button.
                             Install%252520with%252520stylish_thumb%25255B9%25255D
  • Now  a popup window will appear and here choose Install.
                        install%252520user%252520style_thumb%25255B6%25255D
  • That’s all and your Facebook theme, color and appearance are changed.

For Google Chrome

  • Get stylish extension from chrome web store and install it on your browser.
  • After installing Stylish extension on chrome you will see S icon at the top of the browser.
  • Now login your Facebook account.
  • Now Click on S icon from the top of your browser and select Find more styles for this site.
                       22_thumb%25255B4%25255D
  • Now click on any theme and a preview will appear.
  • After that click on Install with stylish button.
                Install%252520with%252520stylish_thumb%25255B5%25255D
  • Now a small window will come out and here just click on OK.
                    ok_thumb%25255B3%25255D
  • That’s all and you are done.

Conclusion

If you get bored with facebook basic blue theme then try this add-on on your browser to change facebook theme, color and appearance. Not just facebook, also you can change Google, YouTube, Orkut and many sites theme.
So we hope you enjoy this and give your feedback here. If you like this then don’t forget to share with your friends.


How to Create a Folder Without Name? Create Nameless Folder 

Basically in Microsoft windows operating system you would not able to create a folder without name, because windows does not allow users to create folder without name. If you don’t believe that then try to create a folder with no name now and surely you get fail to do so. But there is a way to create a nameless folder, if you follow some steps and today through this article we are going to show you how to create a folder without name in windows 7, windows 8 and windows XP. This is not a very technical process or complicated process. This a little trick and anyone can do it.

                                                  nameless%252520folder_thumb%25255B105%25255D

Steps to create a folder without name/ Create nameless folder

Now follow the steps below , which will lets you to create nameless folder in windows operating system.
  • First of all create a new folder on your desktop or any where you want.
  • Now perform a Right click on newly created folder and choose Rename option and then delete the text showing New Folder.
  • Now hold Alt key on your keyboard and type 255 or 0160 from number pad of your keyboard, not those key which is below on function key.
  • After that leave Alt key and then hit Enter.
That’s all and you are done. Now a folder has been created without name.

Conclusion

This trick will work any windows operating system but not worked on non windows operating system. So try it now and we hope you will enjoy this. After doing this give your feedback here.
If you like this post then share it with your friends.


  • RSS
  • Delicious
  • Digg
  • Facebook
  • Twitter
  • Linkedin
  • Youtube